
Genesis Server installation procedure
Applicable for Release 1.0.0
To install Genesis Server properly
you have to execute the following steps on the sever:
![]() Install Java Runtime Environment Standard Edition if necessary
Install Java Runtime Environment Standard Edition if necessary
![]() Download Genesis
Server and unpack it in a directory
Download Genesis
Server and unpack it in a directory
![]() Configure the server and database
Configure the server and database
![]() Start and test
the application server
Start and test
the application server
![]() Install the Genesis
Server Client
Install the Genesis
Server Client
![]() Create an Administrator
Account
Create an Administrator
Account
![]() If necessary
setup your firewall if necessary
If necessary
setup your firewall if necessary
Java
Runtime Environment installation
![]() Open a shell
Open a shell
![]() Check the current
Java version with the command:
Check the current
Java version with the command:
 java -version
If you get an error or the java version is
not 1.3.1 or later, install a new
Java Runtime Environment, else proceed with
"Donwload Genesis Server".
Genesis Server is able to run on Java version
1.3.1, but 1.4.0 is recommended.
| Recommended is Java
Runtime Environment (JRE) Release: 1.4.0 (Windows, Linux, Solaris) |
Download |
If you are using an other platform see: Java Platform Ports |
![]() Download the Java
Runtime Environment (JRE)
Download the Java
Runtime Environment (JRE)
![]() Install it according
to the Installation
Instructions
Install it according
to the Installation
Instructions
For further information about Java click here.
Download Genesis Server
![]() Download or install
the Genesis Server form the installation section.
Download or install
the Genesis Server form the installation section.
![]() Unzip the Genesis
Server zip file. The cross-platform way to do this is to,
Unzip the Genesis
Server zip file. The cross-platform way to do this is to,
in the command shell, issue the command
jar xvf <genesis-zip-file>
where <genesis-zip-file> should be replaced
by the name of your downloaded
archive. If you have not set the path ot the
proper JavaVM, add the path in front of the
jar
command to the right Java-VM directory, for instace:
/usr/java/bin/jar
xvf ...
![]() A JBoss directory hase been created which contains the Genesis Server.
All path
A JBoss directory hase been created which contains the Genesis Server.
All path
statements from here on are relative to the
JBoss directory.
Server configuration
![]() Open the file jboss.properties in the conf/default/
directory
Open the file jboss.properties in the conf/default/
directory
![]() Specify the IP-address
of the server in the line (replace 127.0.0.1 with the server IP):
Specify the IP-address
of the server in the line (replace 127.0.0.1 with the server IP):
java.rmi.server.hostname=IP
address
To get the IP adress of your computer open a shell and use the
command:
Windows NT/2000/XP:
ipconfig /all
Windows 95/98: wincfg
Linux, Unix: ifconfig
Solaris: ifconfig
-a
![]() Check if your java is working properly by typing the following command
in a shell:
Check if your java is working properly by typing the following command
in a shell:
java -version
If you get an error message or the version is not 1.3.1 or later,
you have to set the
path to the proper JavaVM. Open the run.sh (or run.bat) file in
a text editor and
change the path in front of the java command (last line) to the
right Java-VM,
for instace:
/usr/java/bin/java
$HOTSPOT $JAXP -mx1024m -classpath .....
![]() To
change the memory given to JBoss edit in the bin/run.sh (or run.bat) file
the
To
change the memory given to JBoss edit in the bin/run.sh (or run.bat) file
the
command –mxXXXm
(where XXX is the number of MBytes given to the VM, e.g.
1024 for 1 GByte) in the last line:
java
$HOTSPOT $JAXP –xmXXXm –classpath …
Starting the server
Compaq Alpha systems:If you have a FastVM installed it is necessary to change the stack limit by typing:
limit stack 32768
proceed with the unix steps:
Unix systems:
chmod u+x run.shWindows systems:
![]() Start JBoss using the batch file run.bat
Start JBoss using the batch file run.bat
Install the Genesis Server Client
![]() Go tho the Genesis
Server Client installation area and install Genesis Server Client
Go tho the Genesis
Server Client installation area and install Genesis Server Client
on your computer (not necessaraly the server).
Create an Administrator Account
![]() Start the Genesis Server Client
Start the Genesis Server Client
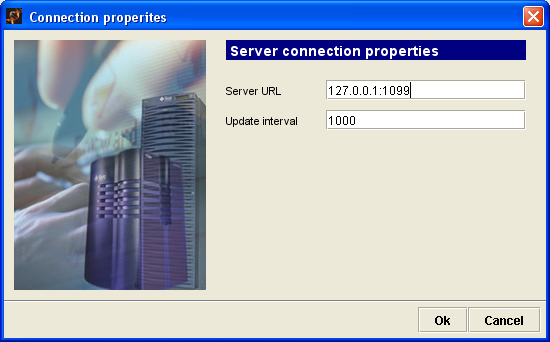
![]() Specify the server
IP Adress in the Server Connection Properties Dialog
Specify the server
IP Adress in the Server Connection Properties Dialog
(Settings->Server Connection...). Replace
127.0.0.1 with the Server IP Adress.
Do not change the Port (:1099)
![]() Specify the server IP Adress in the Database Connection Properties Dialog
Specify the server IP Adress in the Database Connection Properties Dialog
(Settings->Database Connection...). Replace
127.0.0.1 with the Server IP Adress.
Do not change the rest!

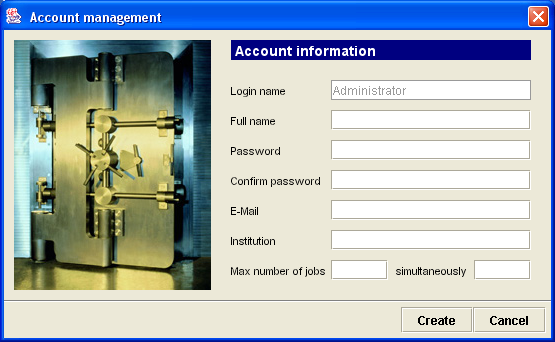
![]() Connect to the server with the Connect button and enter the data for the
Connect to the server with the Connect button and enter the data for the
Administrator account. Leave the last 2 entries
emtpy (Max number of jobs...).
![]() Now you can use the Genesis Server and you may create new user accounts.
Now you can use the Genesis Server and you may create new user accounts.
Do not use the Administrator account for calculation!
Firewall settings
The communication between Genesis client and server is done over the TCP/IP protocol. The default configuration of the JNDI service is listening on port number 1099 on the server. The RPCs (Remote Procedure Calls) are done over RMI (Remote Method Invocation) using other ports. If you run a firewall between the server and the client then several ports have to bee opened. You can find a listing of the used ports in the following table. In future the communication should be made over Http-tunnelling. This would make it easier to run both components behind any firewalls.
|
Port
Number |
Service |
Configuration |
Description |
Should
be opened to |
|
1099 |
JNDI |
jboss.jcml |
Used
by clients to connect to JBoss to get the initial naming context |
EJB
clients |
|
1476 |
Hypersonic
DB |
jboss.jcml |
Hypersonic
is a pure Java DB included in JBoss as a sample. |
DB
clients |
|
4444 |
RMI
Object Port |
standardjboss.xml jboss.xml |
Used
for clients to connect to the server. |
EJB
clients |
|
8082 |
HTML
JMX adaptor |
jboss.jcml |
This
is the HTML interface for dynamic administration of JBoss services.
It allows you to start, stop and review all the mbeans in the server.
Don't let it open to anybody, since it allows people to deploy/undeploy
applications, to view DB passwords, and even to shutdown the server! |
Admin |
|
8083 |
Webserver
fo Java Classes |
jboss.jcml |
Allows
clients to dynamically download classes from JBoss |
EJB
clients |
© 2002 - Webmaster Alexander Sturn - alexander.sturn@tugraz.at